Hello and welcome!
Today I would like to introduce you to the concept of BaC - Blog as Code. Under this name I see the very site you are looking at.
Let’s take a closer look at that construct. The building blocks are as follows:
- git - locally installed version control engine
- Hugo - static site generator
- GitLab - platform that we will be using for our static website. We’ll need an account there
- GitLab Pages - a way of hosting static sites on GitLab platform
- GitLab CI - a way to deploy (and test) our static page to the world
- Sheer curiosity - this is already there, otherwise you wouldn’t be reading this :)
If you want to read a little bit more about a subject and / or prefer to hear from the experts instead of some self-proclaimed guy on the web - the links are there upstairs - Have fun!
Git
git is a code versioning tool that will be helpful for you today and during the rest of your journey with code and infrastructure.
Installation
Microsoft Windows
Let’s tackle the easiest part first. We need to get git on our computer.
If you are on Windows machine please use WSL. Just kidding… Of course, if you want to go for it… Alright, this time for real. To install git on your Windows machine please follow this path. Download the executable, install it and you will be set.
Linux / Unix
On Linux it is a bit easier - most of the time you already have it!
To check if you are one of the lucky men type:
git --version
If the result is something like:
git version 2.53.0
then everything is looking bright!
If you get information about unknown command fear not. You can install git with a simple query to your favourite package manager.
Debian / Ubuntu
sudo apt update
sudo apt upgrade -y
sudo apt install git -y
RHEL / Fedora
sudo dnf update -y
sudo dnf install git -y
Arch
sudo pacman -Syu git
Configuration
Now we are left with a few simple configuration steps.
git config --global user.name "<your_username>"
git config --global user.email "<your_email>"
git config --global init.defaultBranch main # or master
Hugo
After we are done with setting up git we can start getting our (local, for now) static page. First step would be to get the Hugo on our machine. I will cover quick commands for a couple of operating systems but if you find yours missing from the list there is high chance that you know your way around the OSes but in case you are stuck - you can find instructions under this link.
Installation
Microsoft Windows
As per the guidelines you should be using PowerShell for this one - no old command prompt this time.
For Windows you can get the binary here https://github.com/gohugoio/hugo/releases/ or if you are a little more tech savvy you can use the package manager. My recommendation would be WinGet.
To install Hugo with WinGet simply type:
winget install Hugo.Hugo.Extended
Linux / Unix
On Linux it is a matter of using the package manager. A couple of lines and you will be all set.
Debian / Ubuntu
sudo apt update
sudo apt upgrade -y
sudo apt install hugo -y
RHEL / Fedora
sudo dnf update -y
sudo dnf install hugo -y
Arch
sudo pacman -Syu hugo
You can verify that Hugo got installed properly via:
hugo version
Are you starting to see a pattern on Linux? ;)
Initialization
or in simpler words - how to start the playground?
Detailed version
- Change the current directory to /home/albert/Kod/your_name.
- Create or install a theme:
- Create a new theme with the command “hugo new theme ”
- Or, install a theme from https://themes.gohugo.io/
- Edit hugo.toml, setting the “theme” property to the theme name.
- Create new content with the command “hugo new content /.”.
- Start the embedded web server with the command “hugo server –buildDrafts”.
tl;dr version
hugo new project your_name # generates a project structure
# in my case I needed to use other command:
# hugo new site your_name
cd your_name # cd - change directory
git init # initialize git empty git repository
git submodule add https://github.com/adityatelange/hugo-PaperMod.git themes/PaperMod # add a theme submodule
echo "theme = 'PaperMod'" >> hugo.toml # add theme reference to configuration file
hugo new content /posts/hello-world.md # create new post
echo "Hello, world!" >> ./content/posts/hello-world.md # add some text to your new post
hugo server -D # start local development server with drafts
… and we’re done here - you should be able to visit your local page under http://localhost:1313/. You can proceed with any other theme, add new content etc. The world is your oyster. BUT nobody will see that creation of yours unless you publish it - let’s tinker more in that case.
GitLab
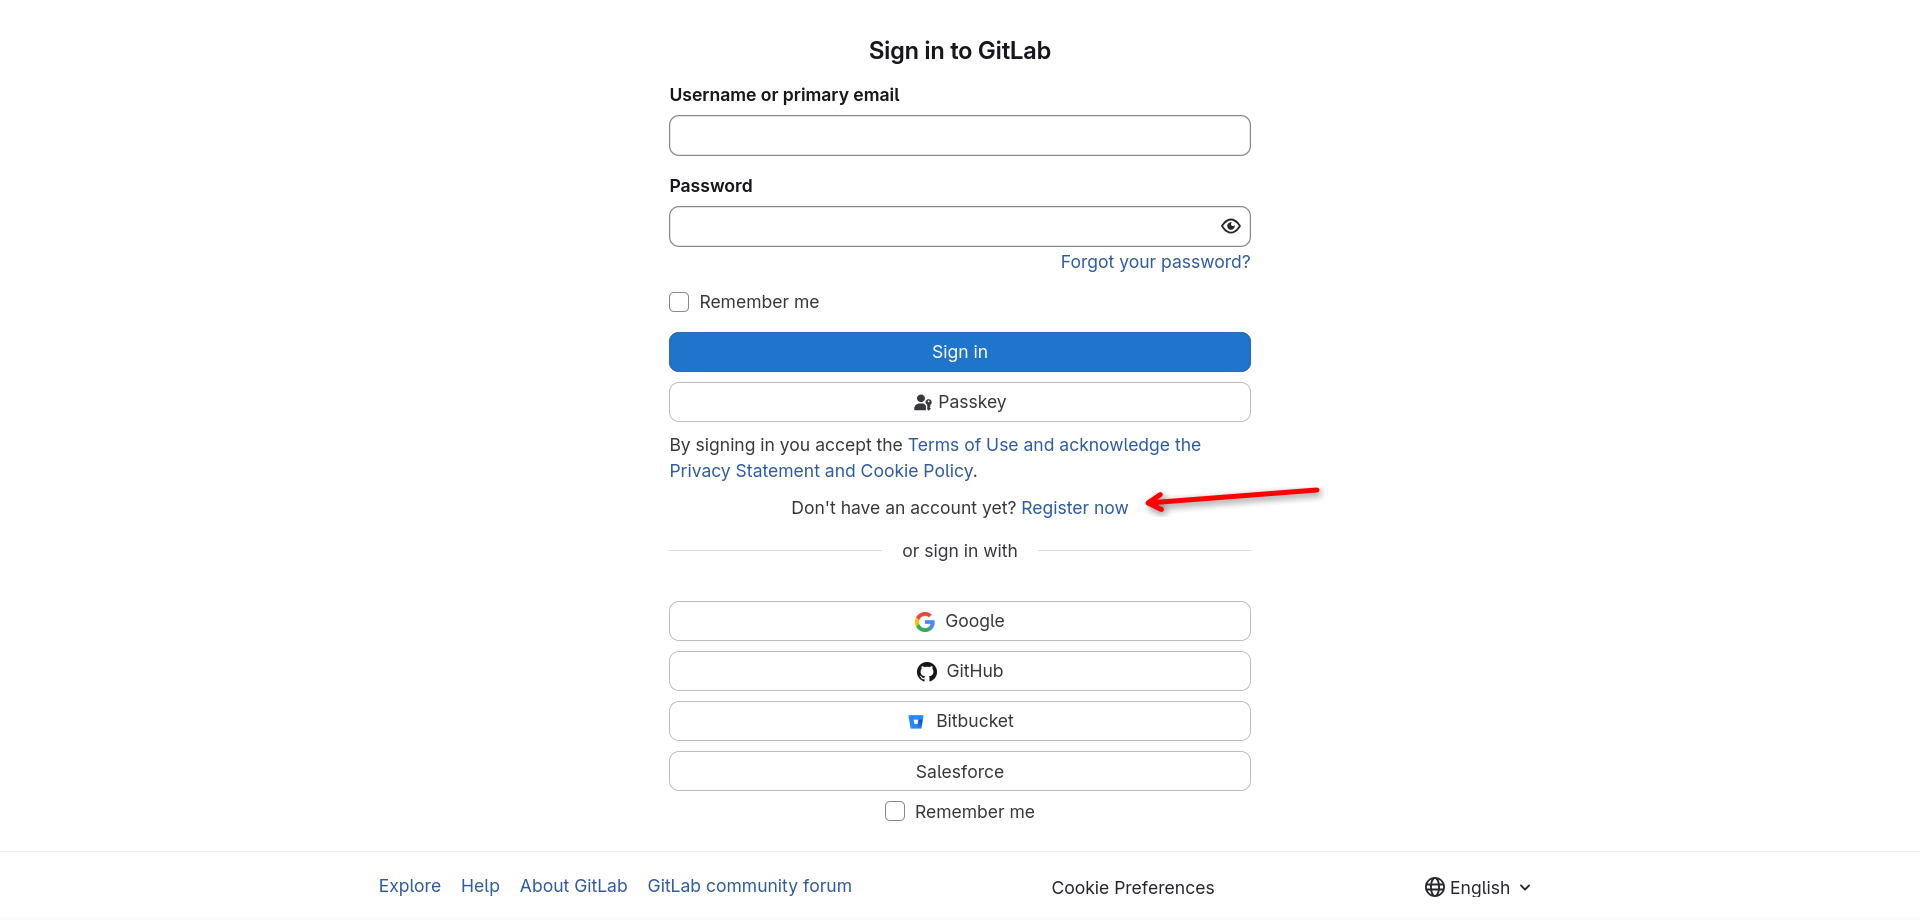
First things first - You will need an account. Set up one using this button on the login page. The process is guided, so it shouldn’t be too confusing.
GitLab Pages
GitLab Pages is a GitLab’s offering for static pages hosting. It is included in a free plan, which makes it ideal for our use case. If you are looking for alternative then a direct competitior would be GitHub Pages. Even the name is almost the same.
For more information I would direct you to the documentation. Probably we could do much more amazing things there but I, myself, am in discovery phase still.
GitLab CI
The last, but not least. The WAY our site will be published.
Overall, GitLab CI is very powerful tool to have in your arsenal when you decide to go DevOps or just making your deployments a little bit more convenient. Maybe at some point I will touch a bit more in that regards but for now let’s go straight to action.
Here is the code:
# docker image section
image:
  # hugo image to use - make sure to mach the version
  # with yours "hugo version" in console in case you forgot
  name: ghcr.io/gohugoio/hugo:v0.152.2
  # a little workaround to have it working
  entrypoint: [""]

variables:
  GIT_SUBMODULE_STRATEGY: recursive
  # the theme we selected earlier
  THEME_URL: "github.com/adityatelange/hugo-PaperMod"

# the instructions to publish themselves
publish:
  pages: true
  script:
    - hugo
  artifacts:
    paths:
      - public
Put in in a file named .gitlab-ci.yml in the main directory of the project. For reference - just look at the code structure of my (this) website.
Summary
That would be all, folks!
Today you got to know how to prepare your own static website for free and a little insight to version control (git) and CI/CD (GitLab CI). Both of the latter are vital parts of everyday development cycle, so feel free to explore on your own and I will try to make sure to include a little overview of each in next posts, maybe with some project attached to make it more fun.
Thanks for your visit and see you next time!